A homepage banner is displayed on a visible part of the webpage as soon as it loads. This part is also called Above The Fold area. Since this area gets first impressions, almost all businesses and marketers place a high value on this area.
For a banner to be effective, we must include the following parts:
- A pleasing design along with a conceptual image
- A clearly stated descriptive headline
- Call to action button
When these components are present with persuasive content, there is likely to be more inquiry or visits to the service page. That’s why online marketers suggest business owners to have an effective homepage banner.
How to create a homepage banner with Rise Blocks.
There are multiple ways to create a banner section for your home page. We will go through the two methods using Rise Blocks so that you will learn how to create an effective homepage banner.
Using Section block, Advance heading block, and advance button block

You can create this banner image using a combination of section block, advance heading block, and advance button block. Here are the steps on how you can get this banner section for your homepage.
- First, click on the Add block icon and then click on the Rise Blocks category.
- Click on the Section block icon to get a section in your WordPress editor.
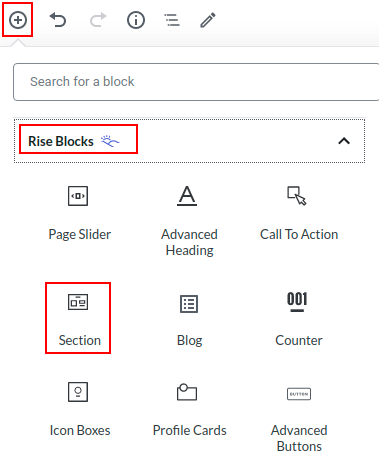
- Select the Section block. You will find the Block setting in the right sidebar. Now, you need to customize the setting in order to get the desired outcome.
- Under General settings, click on full width as a container type.

- Choose the Image as a background type and select your desired image.
- Set image size as full. You can set the background-position as default, top center, or center according to the nature of the image.
- If you like to overlay the image with color then use a background overlay setting. You can choose the color value and opacity of the color from the setting.

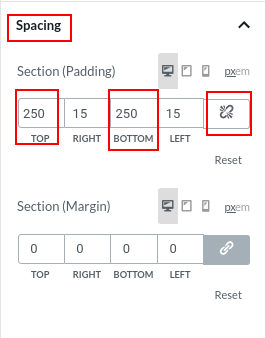
- Now it’s time for spacing. Under Section (padding) section, click the link button to unlink top, right, bottom, and left from each other.
- You can now put the desired value in the top and bottom in order to make the heading in the middle of the banner.
- Now add the Advanced Heading block with the same process as that of Section block.
- Write the heading. You can also add a label and subheading if you wish.
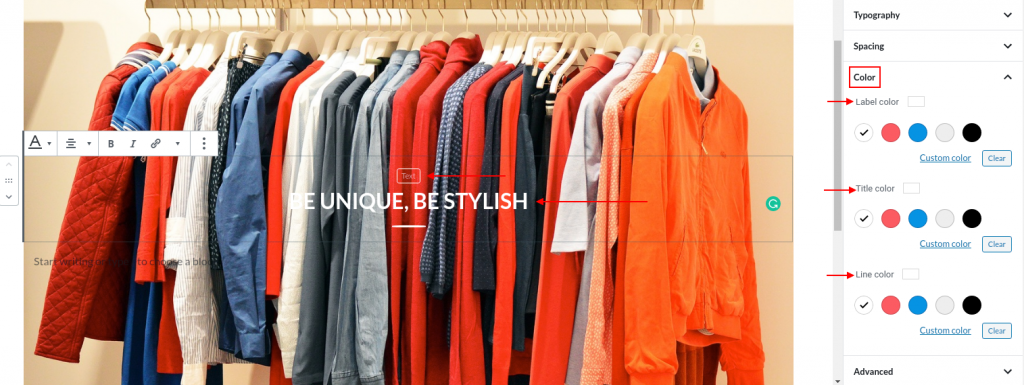
- Under the color section, you can choose a color for the label, heading, separator, and subheading to match the background image.
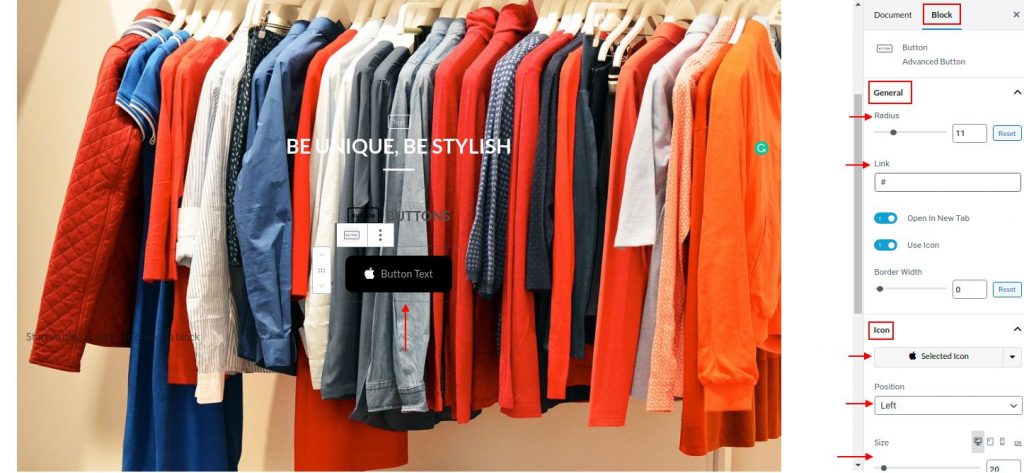
- To get the Advanced buttons block, follow the same step as that of Section block and Advanced Heading block. In the right sidebar, you will get a Block setting to customize the button.
- Click the button to edit the text, you can bold or italicize the text.
- You can make a rectangle button or a curved one. Just mention your desired radius under the General section of setting, 0 for rectangle and 50 for a curved one.
- Put the link of the page that you want the visitor to follow after clicking the button.
- You can also customize the icon – icon selection, position, and size. These settings are accessible under the heading of Icon in Block setting.
- If you would like to change the color of the heading then you can do that from color heading.
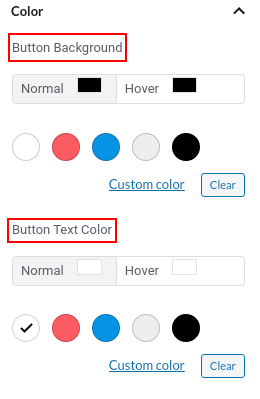
- To add another button, select the Advanced Button block. In the block setting, click the Add New Button icon to add a new button. Make necessary customization as per the earlier button.

- Here’s your homepage banner for the website.
Using Page Slider
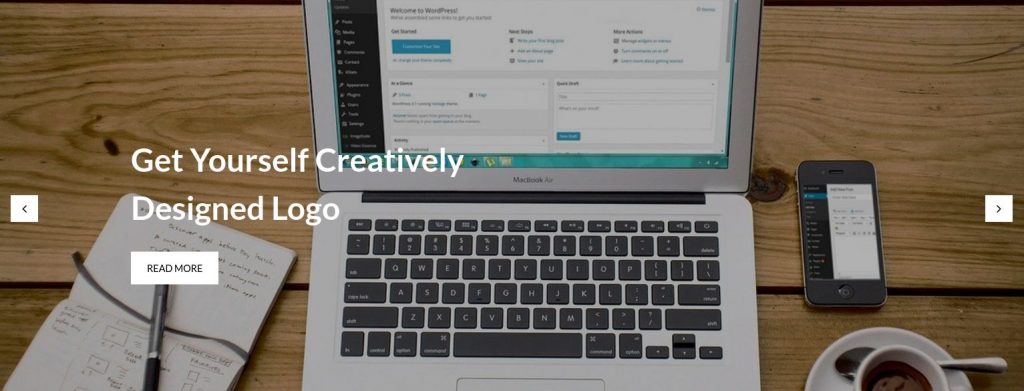
The beauty of a Rise Blocks comes into play when you can use only one block to make an awesome homepage banner. And that is by using Page Slider block. This block fetches other pages’ heading, excerpts, and featured images. Then displays it in a carousel layout with a link to that specific page. Here are the steps that you can follow to get an awesome homepage banner through Page Slider.
- First, create service pages for your website. Ensure that you set a Featured image on each service page that you wish to display on the website.
- After you have a service page, head back to the homepage
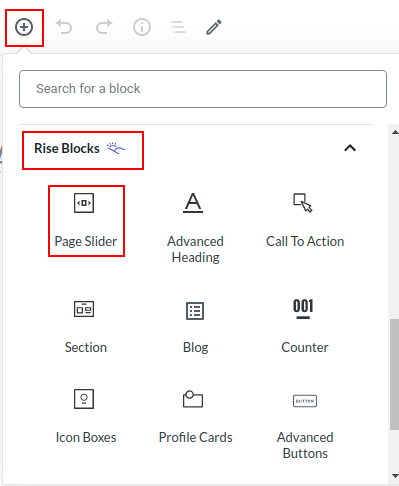
- Click Add Block icon accessible from the top left corner of the WordPress editor and then on Rise Blocks category.
- Click on the Page Slider block icon to get a slider in your WordPress editor.
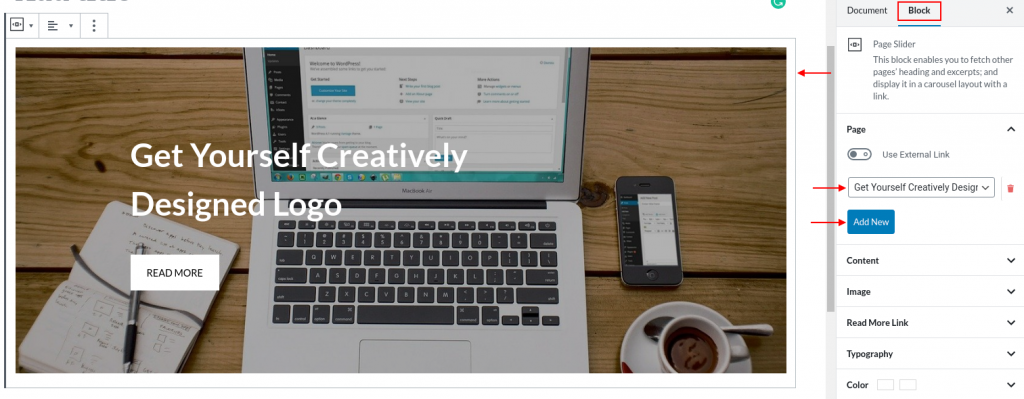
- In the Block setting available in the right sidebar, you will get the option to add a new page.
- Click the button to activate the setting. On the drop-down under the Page section, you will find the option to add a page.
- Select your service page. You will find that the page slider will get refreshed and the block in the WordPress editor will display the page’s Featured image on the background with the page title as Heading along with the Read More button.
- If you wish to add other pages then repeat the above step till you get desired pages to display in the slider.
- Through the Block setting, you can also customize the banner section to make it attractive.
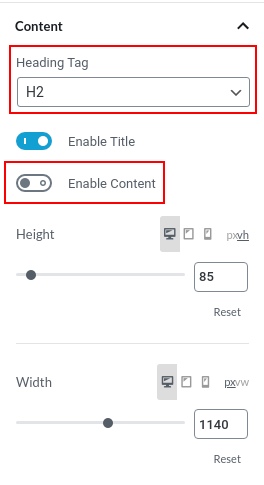
- Under the content section of the Block setting, you can toggle the heading tag. Ensure to turn off the Enable Content option as we don’t want to display the excerpt in the slider.
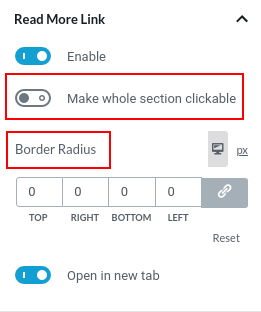
- If you would like to hide the Read More button, and make the whole section clickable, activate the option accessible under the Read More Link Section. In this section you can also adjust Border Radius as per your requirement, either make the button rectangle or with a curved button.
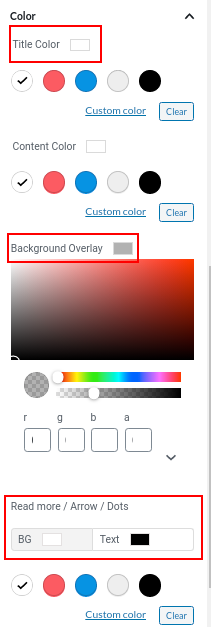
- Lastly from the Color section, you can customize the color of the title and also insert overlay to the background image.
- Here’s the homepage banner for your website.
Conclusion
With this article, you learned how to create a homepage banner, manually for your website. For your ease, we have already created some banner templates. if you have installed themes from Rise Theme, then you can import these templates through the Get Rise Blocks Templates button available on the Document setting in the right sidebar. After clicking the button, Rise Block library is popped up, don’t forget to click – Components accessible in the top right corner of the pop-up. Click on the banner menu, there you will find awesome banner designs. Click on the Insert button to get the design. If you still have a problem understanding this article, then feel free to comment on this article.
